
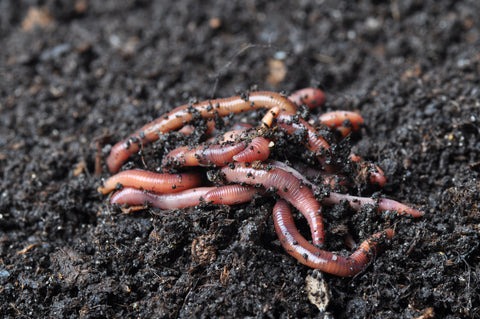
Metal raised garden beds have revolutionized modern gardening, offering precise control over soil quality, drainage, and space. Yet, even the most meticulously designed beds can fall short without a thriving underground workforce: earthworms. These unsung heroes of the soil ecosystem are nature’s engineers, tirelessly aerating, fertilizing, and protecting your plants. But determining the right number of worms for your raised bed isn’t just a guessing game—it’s a blend of ecology, mathematics, and practical know-how. Let’s explore how to harness these wriggly allies effectively.
Why Earthworms Are Non-Negotiable for Raised Beds
Raised beds, while efficient, face unique challenges. Unlike in-ground gardens, their confined space limits natural soil processes. Over time, organic matter depletes, compaction occurs, and microbial activity dwindles. Earthworms counteract these issues through three transformative actions:
1. Soil Aeration:
Worms tunnel through soil, creating microscopic channels that allow oxygen and water to penetrate deeper. This is especially critical in raised garden beds, where foot traffic or heavy rains can inadvertently compact soil.
2. Nutrient Cycling
As worms consume decomposing leaves, compost, and mulch, they excrete castings—a potent, pH-neutral fertilizer rich in nitrogen, phosphorus, and potassium. A study by the University of California found that worm castings can increase crop yields by up to 25%.
3. Disease Resistance:
Worm castings contain beneficial microbes that suppress soil-borne pathogens like Fusarium and Pythium, reducing the need for chemical fungicides.
However, overcrowding worms can lead to competition for food, causing mass migration or die-offs. Striking the right balance is key.
The Goldilocks Formula: Calculating Your Worm Quota
The ideal worm population hinges on your bed’s size, soil condition, and goals. Here’s a step-by-step guide:
Step 1: Measure Your Bed’s Volume
Calculate cubic feet: Length (ft)×Width (ft)×Depth (ft)=Cubic Feet
For example, a 4’x8’x1′ bed = 32 cubic feet.
Step 2: Assess Your Soil’s Needs
l Maintenance Mode (healthy soil): 10–15 worms per cubic foot.
l Rehabilitation Mode (compacted, low-organic matter): 20–25 worms per cubic foot.
Step 3: Do the Math
For a 32-cubic-foot bed in rehabilitation: 32×20=640worms
Pro Tip: Start with 75% of your target population. Worms reproduce rapidly—a single red wiggler can produce 2–3 cocoons weekly, each hatching 2–5 juveniles.
Choosing Your Worm Squad: Species Matters
Not all worms thrive in raised beds. Focus on these two compost champions:
1. Red Wigglers (Eisenia fetida)
l Strengths: Voracious eaters, ideal for beds with heavy compost layers.
l Limitations: Prefer shallow soil (top 6 inches); may flee if food runs low.
l Best For: Urban gardens with frequent kitchen scrap additions.
2. European Nightcrawlers (Eisenia hortensis)
l Strengths: Larger, burrow deeper (up to 18 inches), tolerate cooler temps.
l Limitations: Slower breeders; need deeper bedding.
l Best For: Cold climates or deep beds (12+ inches).
Avoid: Common garden earthworms (Lumbricus terrestris). While excellent in open fields, they often struggle in raised beds’ confined, warmer environments.
Introducing Worms: A Stress-Free Relocation Guide
Prep the Raised Bed
l Moisture Check: Soil should feel like a damp sponge. Dry soil repels worms; soggy soil drowns them.
l Food Buffet: Mix 1–2 inches of compost or aged manure into the topsoil. Avoid fresh manure—it generates heat.
Acclimatize Gently
l Place worms (in their original bedding) on the soil surface.
l Leave the container open overnight. Worms will migrate into the bed voluntarily, reducing shock.
First Feeding
l Bury small amounts of kitchen scraps (apple cores, lettuce) 2–3 inches deep.
l Avoid: Citrus, onions, meat, or dairy—they acidify soil or attract pests.
Sustaining Your Worm Population: Long-Term Care
Worms self-regulate their numbers, but these practices ensure longevity:
Feed Strategically
l Frequency: Add scraps every 10–14 days. Overfeeding causes rot and odor.
l Diversity: Rotate between coffee grounds (nitrogen-rich), shredded cardboard (carbon), and crushed eggshells (calcium).
Monitor Conditions
l Temperature: Worms thrive at 55–77°F (13–25°C). Use shade cloth in summer; mulch in winter.
l pH Balance: Aim for 6.0–7.0. Test kits are available at garden centers.
Troubleshooting
l Mass Exodus? Likely due to overwatering, heat, or food scarcity. Add coconut coir to absorb excess moisture.
l Mite Infestation? Reduce feeding and sprinkle diatomaceous earth (food-grade).
Conclusion
Think of worms not as a quick fix, but as long-term collaborators. For a standard 4×8 raised garden beds, begin with 500–800 worms, prioritize soil health, and let time work its magic. Remember, thriving soil is a living ecosystem—one that rewards patience with fewer pests, richer flavors, and blooms that speak for themselves.
So, the next time you spot a worm in your bed, tip your hat. These tiny tillers are proof that great gardens aren’t built—they;re grown, one cast at a time.
FAQs
Q: Can I “wild source” worms from my yard?
A: Not recommended. Most wild worms are soil dwellers, not composters. They’ll likely perish or flee.
Q: How quickly do worms improve soil?
A: Visible aeration occurs in 1–2 months. Nutrient enrichment peaks after 6–12 months.
Q: Will worms survive winter in raised beds?
A: Nightcrawlers can endure mild frosts if beds are mulched. Red wigglers may die but leave cocoons that hatch in spring.
Q: Can I use worms with fertilizer?
A: Organic fertilizers (e.g., fish emulsion) are safe. Avoid synthetics—they harm worms and microbes.
